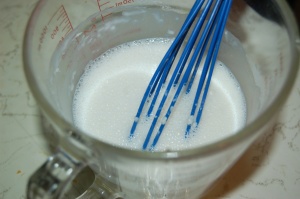
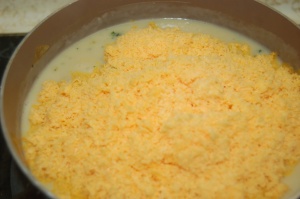
Goat Cheese & Sundried Tomato Couscous

Goat cheese is one of those things that people either love or hate. I love it, I always have. I love its strong tangy flavor. I haven’t done much cooking at all since Ryan has been gone, so I figured today I should at least pretend to make my kitchen look occupied :-) This is a 100% original recipe, so if you hate it I can’t even blame it on anyone.

Goat Cheese & Sun-dried Tomato Couscous

  • 1 cup chicken broth
  • 2 tbs olive oil
  • 3/4 cup uncooked couscous
  • 2 tbs marjoram leaves
  • 1/2 tsp chopped garlic
  • 2 tbs sun-dried tomatoes packed in oil
  • 1/4 cup goat cheese(I used the goat cheese with tomato & basil but you can use any flavor you prefer)

To start off, heat the chicken broth & olive oil to a boil.

While the water is warming up, roughly chop the tomatoes & goat cheese and set aside.

Once at a boil, add the couscous to the water and allow to cook for approximately 5 minutes.

Add in marjoram leaves & garlic and stir well.

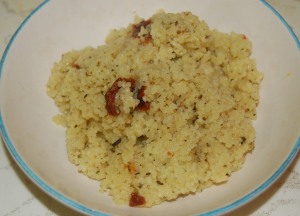
Mix in tomatoes & goat cheese and stir until the goat cheese is melted.

Serve as a side dish to any middle eastern dish :-D

Makes approximately 4 small servings

Garlic Hummus

Hummus is probably one of the easiest things to make on the planet which is probably why it suprises me that people pay sooooo much money to buy it at the grocery store! I grew up eating a lot of hummus during my high school years after my mom got onto a middle eastern food kick. We tired a lot of things from lamb stew to wrapped grape leaves, some of which were amazing…some that I will never eat again. It’s a shame that my husband doesn’t like Hummus to much, otherwise I’d probably make it a lot more often!I hope you at least give it a shot once in your life. It only takes about 5 minutes to make…what have you got to lose? The only thing I will say about this recipe is you cannot substitute for the Tahini. For those of you who don’t know what Tahini is, it is a runny paste made from sesame seeds. It looks like thin peanut butter and has a mild nutty flavor. I had a very hard time finding Tahini in Kansas and I actually had to have my mom mail me some from New York. Some recipes say you can use peanut butter in place of the tahini, but it really doesn’t work…trust me, I’ve tried! You will end up with a funny tasting, odd textured goo.

Garlic Hummus

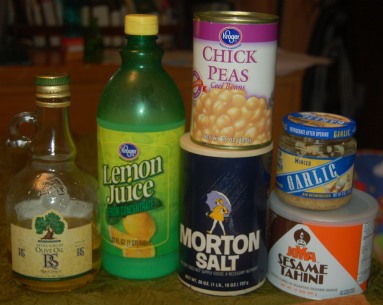
  • 1 (16oz) can Chick Peas
  • 1/4 cup liquid from the canned chick peas
  • 3-5 tbs lemon juice(depending on personal preference, I personally use only 3)
  • 1 1/2 tbs tahini
  • 2 crushed garlic cloves(or 2 tsp chopped garlic)
  • 1/2 tsp salt
  • 2 tbs olive oil

Image

To start off, drain the liquid from the can of chickpeas. You want to save 1/4 cup of it because you are going to add it back into the hummus later.

Image

Next combine all ingredients except the olive oil & chickpea liquid in the blender.

Image

Blend on low for a few minutes until things start to look pretty well blended

Image

Add the liquid from the chickpeas. Blend an additional minute or so until the mixture is creamy.

Pour into a bowl. Make a small indentation and add the olive oil.

Image

Mix well, serve with crackers or warm pita. Enjoy!

Image

Rum Butter Cookies

I felt like baking something today after the dreary, cold, wet day we’ve had here. I found a recipe that sounded good, but I didn’t have half the ingredients it called for!(Don’t you hate when that happens?) I decided to take that recipe & adapt it to what I did have. These are a cakey type cookie. I actually only baked about 6 of them…otherwise I’d eat them all! The rest of the dough I froze for Ryan to bake while he’s down there.

Rum Butter Cookies

  • 1/2 cup butter
  • 1 cup packed brown sugar
  • 1 egg
  • 1/2 cup milk
  • 1 tsp rum extract
  • 2 cups flour
  • 1/2 tsp baking soda
  • 1/2 tsp salt

Start off by creaming the butter & brown sugar in a bowl until well mixed.

Next stir in your egg.

Once your egg is fully mixed in, add in the milk & rum extract.

Slowly mix in the flour until a batter has been formed.

Stir in your baking soda & salt.

Bake for 10-12 minutes at 375* or until firm to the touch.

I decided to go ahead and mix up a simple glaze(powdered sugar & enough milk to make it a thin glaze) but you can absolutely eat these just as they are.

Broccoli & Cheddar Soup

Learning how to make soup was one of the best things I’ve ever done. For the most part they are fairly easy to make & are perfect on a cold day. Ryan has been battling a pretty nasty viral cold that’s been going around so I made him some cheddar & broccoli soup tonight. This is great tasting soup!

Broccoli & Cheddar Soup

  • 1/4 cup butter
  • 1 medium onion, chopped
  • 2 tsp garlic powder
  • 1/2 pepper salt
  • 1 head broccoli(or 16oz frozen chopped broccoli)
  • 1 quart chicken broth
  • 1/2 tsp flour
  • 1 1/2 cup whole or 2% milk
  • 8 oz shredded sharp cheddar cheese
  • salt to taste

Melt your butter in a large saucepan. Cook your onion in the butter until soft & translucent.

While the onions are cooking, chop your broccoli if using fresh.

Add in the garlic powder & pepper to the onions and allow to cook for an additional minute.

Stir in broccoli & chicken stock

Bring to a boil & allow to simmer until broccoli is tender. While the broccoli is cooking, whisk the flour & milk together.

Stir milk into the soup slowly to allow it to thicken.

Stir in cheese until melted.

Serve warm with bread sticks or bread bowls!

This soup completely classifies as comfort food!

Salmon Cakes with Homemade Cocktail Sauce

So this was SUPPOSED to be published yesterday with the auto publisher…however apparently I am not smart enough to make it work lol. I do not have a post today due to the fact that I just arrived home from having my gallbladder removed. It wasn’t the most fun in the world but was certainly better than I expected! I had a great group of nurses. Apparently while in recovery the first two things I asked were “Where am I?” and “When can I ride my horse?”. This just made me want to laugh(couldn’t ACTUALLY laugh because it hurts). Anyway, here is yesterdays salmon cakes. My very first 100% original recipe!!!

Salmon Cakes with Home Made Cocktail Sauce

For the cakes:

  • 2 cans boneless, skinless salmon(drained)
  • 2 tbs cornmeal
  • 2 tbs flour
  • 1 tbs wheat germ
  • 1 egg
  • 1 tsp seafood herb mix(if you can’t buy a pre-made mix, you can make your own out of basil, dill, parsley, chives, & thyme.)
  • 1/2 tsp garlic powder
  • 1/2 tsp onion powder
  • Shredded cheese(optional)

For the sauce:

  • 2 tbs ketchup
  • 1 tsp horseradish sauce
  • 1/2 tsp prepared horseradish

Preheat a skillet to med-high with a small amount of oil or a quick spray of non-stick cooking spray.

Start by draining your salmon & setting in a bowl

Add in the cornmeal, flour, wheat germ, herbs & garlic/onion powder. If you are adding cheese in, now is the time to do it.

Add in the egg & mix thoroughly using your hands.

The mixture should be wet and easily molded into cakes. I made mine about 2″ across but you can make them larger.  The 2″ ones are a perfect appetizer size. Set cakes on the skillet or griddle.

Cook on one side until they begin to brown. Flip and allow the other side to brown as well.

Remove from heat once nicely browned & serve warm.

Now onto the cocktail sauce…

VERY simple to make-

Add all 3 ingredients in a bowl.

Mix Well…and you are done :-)

I love the recipe. Maybe because was so proud to be able to go from not cooking at all to make a recipe from scratch, but I still love these!

Beef & Rice Stuffed Peppers

Growing up I HATED peppers. I would not eat onions, tomatoes or peppers at all. Thankfully since I got married, my wonderful husband has taught me that none of those are so bad. Stuffed peppers was something I always thought looked good but never made because I didn’t like peppers. It wasn’t until recently that I gave them a shot. This is my own person recipe combination, as with most recipes, you can add or subtract what you’d like.

Beef & Rice Stuffed Peppers

  • 1.5 lbs ground beef
  • 4 bell peppers(any color)
  • 1 can corn(optional)
  • 1 can kidney beans(optional)
  • 1 package instant spanish rice
  • 1 cup shredded cheddar cheese
  • french fried onions(optional)

Preheat your oven to 350*

Brown your beef in a skillet. Drain.

While the beef is cooking, cut off the top of the pepper and scoop out the insides leaving a pepper “bowl”.

Add in the rice into the beef along with the amount of recommended water(should say on the back of the package)

While the rice is cooking add in the corn & beans.

When the rice is fully cooked, remove from heat & stuff into the peppers

Sprinkle shredded cheese over the peppers.

Place in the oven for 10 minutes or until the cheese is melted & the peppers are hot. Remove from the oven & sprinkle with the french fried onions. Serve immediately.

Hope you enjoy!

Chicken & Chips Casserole

Yesterday was one of those days that I really did not feel like making a huge labor intensive meal, so it automatically became casserole night. This casserole is one of my favorites and is very simple to make, plus it is very easy to double or triple if you have a lot of people for dinner. It has more of a Mexican taste to it due to the green chilies, but if your family doesn’t like peppers you can easily omit them and make this a cheese-only casserole.

Chicken & Chips Casserole

  • 3 cups cooked, cubed chicken breast(approximately 2 large chicken breasts)
  • 4 cups crushed tortilla chips
  • 1 cup sour cream
  • 1 can Cream of Chicken soup
  • 2 tbs taco sauce or salsa
  • 1 can green chile peppers(chopped)
  • 8-12 slices American Cheese(depending on how big your casserole dish is)

Preheat your oven to 350*

To start off, if you haven’t already cooked your chicken now is the time to do it. I usually have precooked chicken in the freezer to save on time but I ran out the other day so I had to cook some up. Just a food safety note, I’m sure most of you know but when cooking chicken, always use a different fork or spoon to remove the cooked chicken. Don’t use the one you used to put the raw chicken in the pan or to flip it over.

While your chicken is cooking, in a separate bowl mix together the sour cream, cream of chicken soup, taco sauce or salsa, & chile peppers.

Once your chicken is finished cooking, layer half the chicken in an un-greased casserole dish. Spread half the sour cream & soup mixture over the chicken. Next place on half the cheese slices. Finish the layer with half the chips.

Repeat the above steps for a second layer. Place in the oven for 25-30 minutes or until bubbly. Serve immediately.

If you try this casserole, feel free to let me know how your family likes it!


Make your own (very cute) sugar cubes!

After visiting my therapists yesterday(my horses), I figured I should probably make something special for them. I had found awhile ago basic instructions here on how to make your own sugar cubes. For those of you who don’t have horses, don’t fret! These are great to make for tea or coffee too! These look super cute in small heart shapes. Unfortunately, I don’t have a heart shaped chocolate mold…I have ones in the shape of cows, roosters & pigs. Oh well, the horses won’t care!

Homemade Sugar Cubes

  • Granulated Sugar(white or brown)
  • Water
  • Chocolate molds

To start with put however much sugar you would like to use in a bowl. Slowly add COLD water 1 tsp at a time until the sugar forms a paste. You do not want it runny or else it will be hard to work with and take forever to dry.

Once you have your paste to the desired consistency, place small amounts into the molds. You want to make sure the sugar is packed firmly.

Allow to fully dry & then carefully remove from the molds. Mine took about a week to dry.

Store in a ziplock bag & use as treats for your horses or in your coffee & tea.

Chocolate Coated Coffee Beans

I’m not a coffee drinking at all. I’m more in the tea party(haha…tea party..get it? oh never mind). Ryan however loves his morning coffee. One day while grinding his coffee I decided to try eating a whole coffee bean. It was actually suprisingly tasty although slightly gritty. I had some chocolate sitting out that I had been planning on using for another recipe so I got the random idea to try coating the coffee bean in chocolate and seeing how it tasted. I had seen them for sale in the stores so I imagined they couldn’t be THAT horrible if they sold them for more money than I thought they were worth. I still eat them from time to time and have tried different chocolates. I love the cinnamon chips mixed with chocolate, so far that’s my favorite! If you are a coffee lover you should give these a try(provided you don’t mind a little bit of gritty!)

Chocolate Coated Coffee Beans

  • Roasted Coffee Beans of any flavor of your choosing
  • Chocolate(Wiltons Melting Chocolate works best but you can use chocolate chips)

Melt your chocolate in the microwave for 30 seconds at a time stirring often. Do not over heat or your chocolate will turn to paste.

Dip the coffee beans in the chocolate with a fork until fully coated

Spread on wax paper until the chocolate hardens.

Store in an airtight container.

Garlic Kale Chips

I don’t know that I have EVER considered kale an edible food, then again I’ve never been a huge vegetable fan. The only time I had ever seen it used for anything was as a garnish. I had seen recipes floating around for various “vegetable chips” and in an effort to eat healthier, decided to give them a shot. We live in a VERY small town and I had to go to 3 different grocery stores before I found kale. I almost backed out completely but the whole huge bundle of kale was only $.98(can’t be that popular) so I bit the bullet and brought it home. The first batch I made were NASTY! I overcooked them and they were like charcoal. I really had to talk myself into trying it again but I’m glad I did because they actually aren’t too bad. Don’t get me wrong, I’m not going to run out and stock up but they were a good occasional way to get some variety in my vegetable consumption. I’m sure there are those of you who love vegetables…far more than I do…and you’ll probably love this recipe :-) The original recipe that I used came from here.

Garlic Kale Chips

  • Kale
  • Olive Oil
  • Garlic Powder

Preheat your oven to 375*

Wash & dry your kale and spread out on a cookie sheet.

Brush both sides with olive oil & sprinkle garlic powder & salt(or just garlic salt if you want the easy way) over the kale.

Place in the oven and bake for several minutes. The kale should still be green but crispy. I would say about 5-15 minutes depending on your oven. The original recipe said 10-15 minutes and the first batch I made were burnt by 7 minutes. It just depends on the oven. If you have an oven that is older than you are(like I do), they will probably cook faster.

This is going to make me sound like a horrible blogger…but I don’t have any pictures of the final product…I’m SORRY! Maverick woke up from his nap just as I pulled them out of the oven and immediately went into a full blown screaming, red in the face, can’t breathe kind of fit. While trying to calm him down, I managed to eat the kale chips and totally forgot I still needed to take a picture…opps! I have a picture of the burnt ones…so I can show you what they SHOULDN’T look like… yours should be much greener than these.

Feel free to share a better photo of what they are SUPPOSED to look like if you happen to try these :-)


Previous Older Entries